Configure the Sysdig Agent
To integrate your monitoring instance with your OpenShift cluster, you must run a script that creates a project and privileged service account for the Sysdig agent.
If you've been invited to a lab account where an instance of Sysdig has already been provisioned and configured, skip the create and deploy steps and go to verify the agent at the bottom. Retrieve your Sysdig instance by looking at the cluster name in the tags attached to the instance.
Create a Sysdig service instance
- Create an instance of IBM Cloud Monitoring with Sysdig from the catalog:
- Set the Service name to YOUR_IBM_ID-sysdig.
- Select the location where your cluster is created. If the location is not in the list, pick the closest region (e.g. us-south).
- Use the default resource group.
- Click Create.
- In the Observability category, under Monitoring, locate the service instance you created.
Deploy the Sysdig agent in the cluster
On your instance, click Edit sources.
Before running the curl command in the next step, make sure you're still logged in to the cluster. Access your cluster using the oc CLI.
Select the OpenShift tab and run the curl command next to Public Endpoint
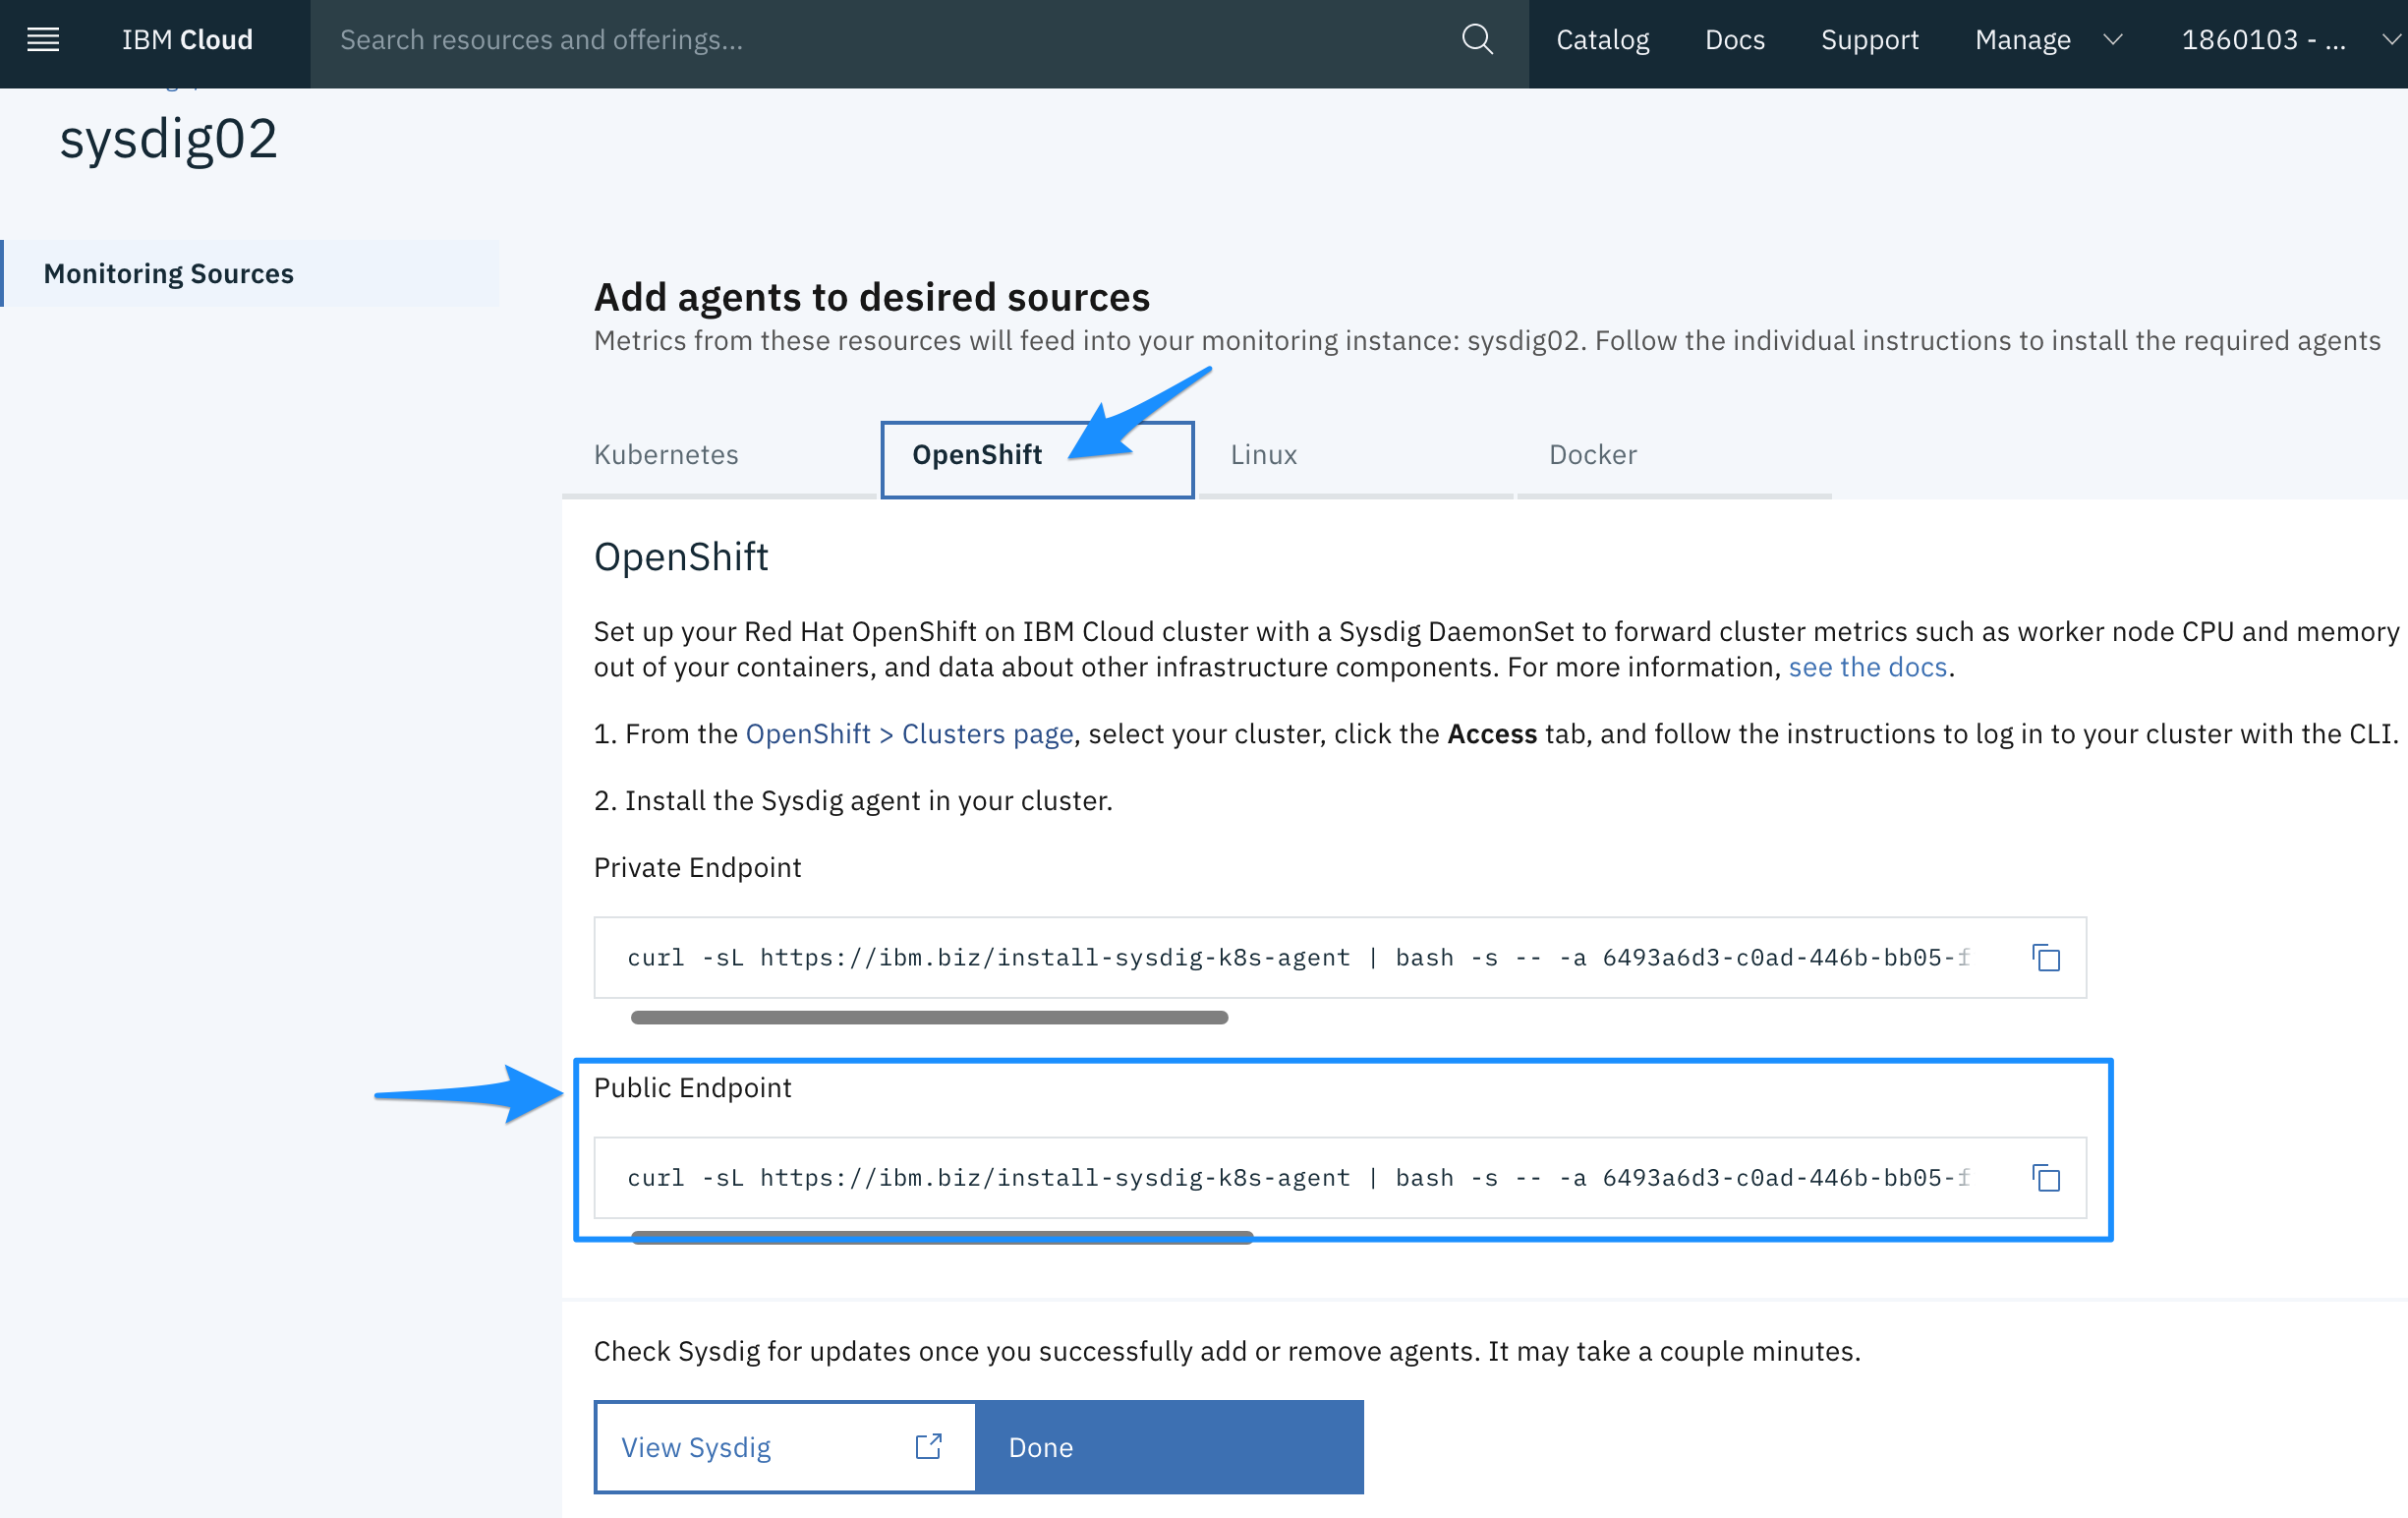
The Sysdig agent collects metrics such as the worker node CPU usage, worker node memory usage, HTTP traffic to and from your containers, and data about several infrastructure components.
Verify that the Sysdig agent is deployed successfully
Verify that the sydig-agent pods on each node have a Running status.
Run the following command:
oc get pods -n ibm-observe
Example output:
    NAME                 READY     STATUS    RESTARTS   AGE
    sysdig-agent-qrbcq   1/1       Running   0          1m
    sysdig-agent-rhrgz   1/1       Running   0          1m